Making Alchemy Earrings Using Lost-Wax Casting

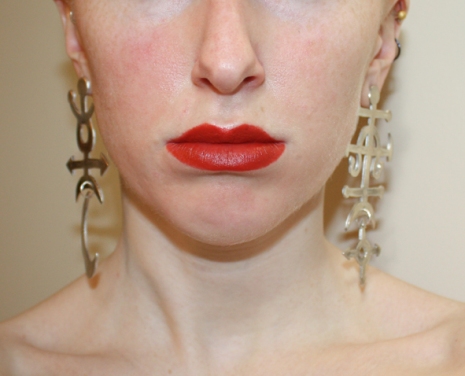
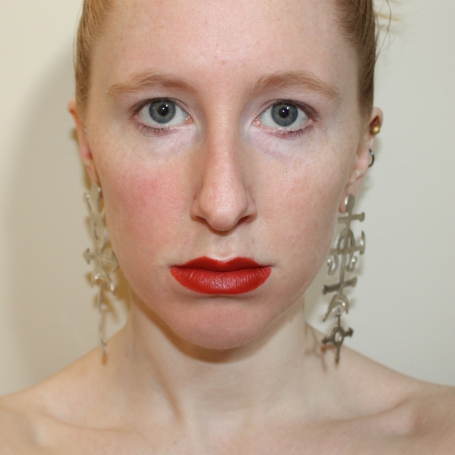
So, I made a pair of huge asymmetrical earrings:
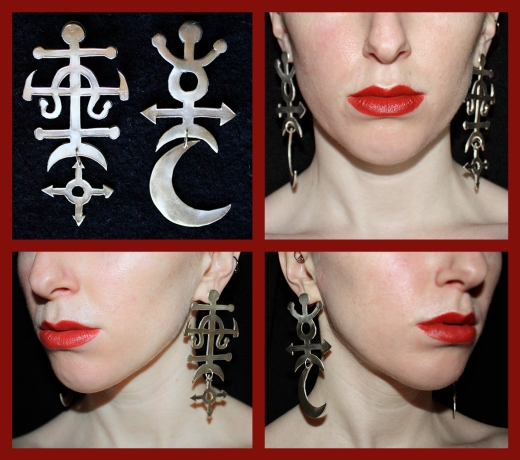
Image
Clearly they go well with bright red lipstick. 

Okay, so I’m not going to go into the whole blow-by-blow of how to make something using lost-wax casting again. If you want to read about that, go here.

I did, however, chronicle making these earrings, so I’m just going to picture dump BECAUSE I CAN!

DESIGN PHASE

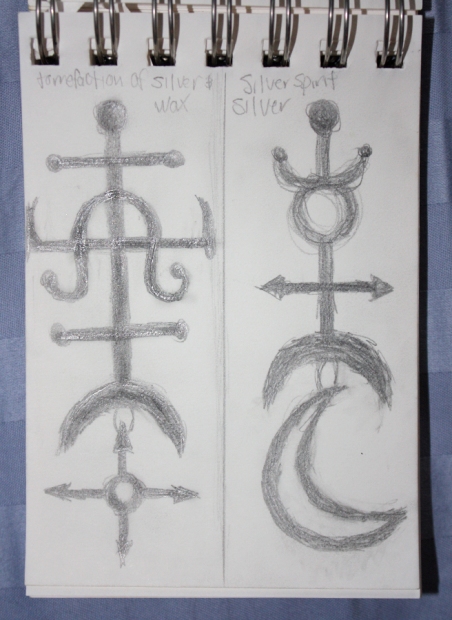
Image
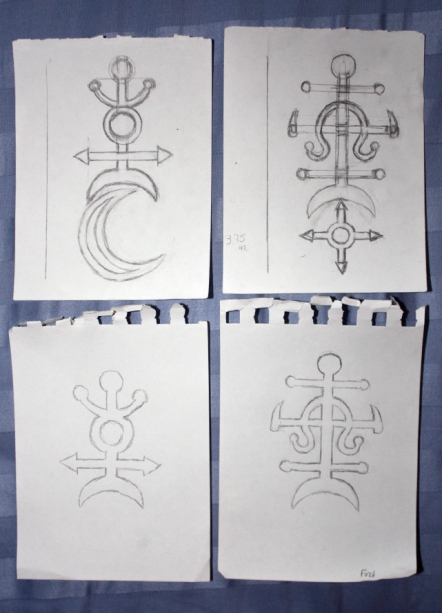
Initial rough drawing.

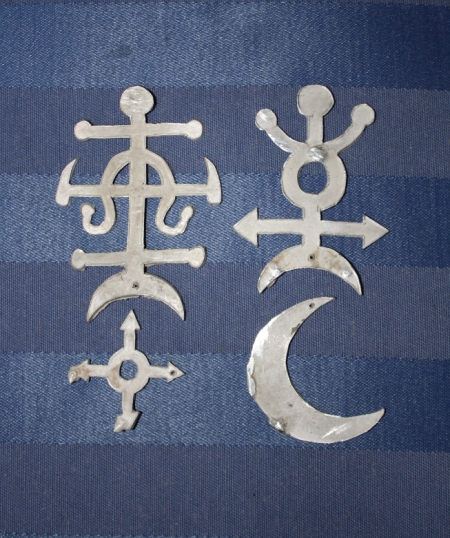
I had the idea to make something with alchemy symbols for a while. I was going to somehow do a ring of it, but it was impractical. So here is the fruition of my alchemy idea! I first chose my symbols based on meaning and design appeal. I didn’t want them to be just random symbols with no connection to anything, so I chose the symbols for silver, silver spirit, the torrefaction of silver, and wax. I’m So Meta Even This Acroynm (thank you, XKCD). I had to redesign the alchemy symbol for silver spirit just slightly as you can see by adding a top part for the post/symmetrical reasons. I also added arrows to it so that it would better connect to the other earring and not look totally unrelated.

Image
Final to-scale drawings. 

Straight lines are not my friends. I am terrible at drawing straight lines, as evidenced above. I was also super careful to make sure that the earrings were of the same length. Asymmetrical is one thing, but different lengths is annoying (at least to me).

WAX PHASE

Image

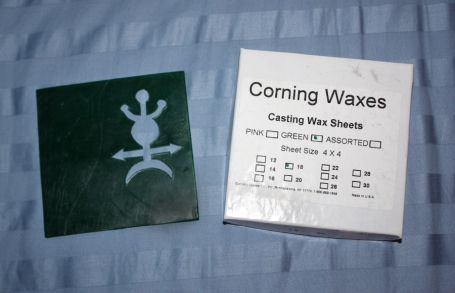
I used wax sheets (seen above).  Using the master drawings of the earrings, I traced copies and then laid the drawing over the wax sheet. I used a knife to cut the outline of the symbol in wax.
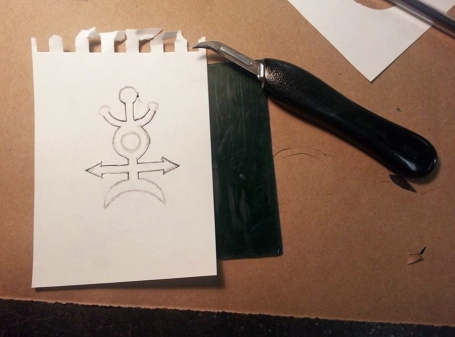
Image
Taken with my phone, hence the weird color.

This was a good deal more difficult than it sounds. I initially tried to use an x-acto knife, but the shape of the blade resulted in strange pressure issues on the sheet of wax and instead of cutting cleanly, it more or less tore it. The curved blade (above) was perfect (although in a moment of idiocy, I cut my thumb open with it…).

Image

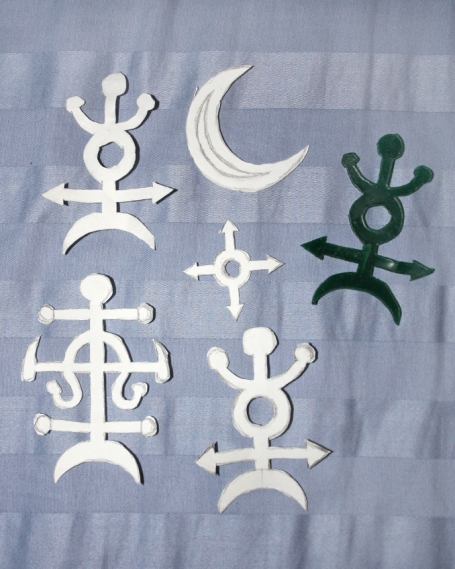
Here we see a bunch of paper cut-outs and a reject silver spirit made of wax. Oddly, it was the less-complicated silver spirit symbol that gave me the most trouble.

CASTING IN METAL PHASE 

Image

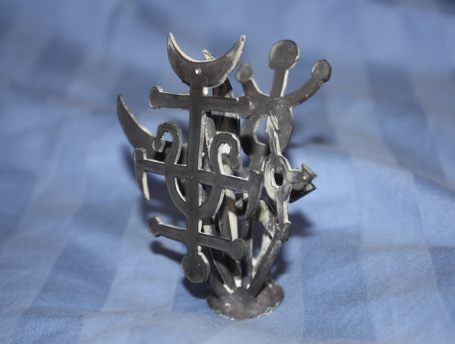
By some miracle, I managed to cast all the pieces together in one cylinder. As you can see in this picture, I ran out of time (as usual) and didn’t fully clean off the investment from casting. I also hadn’t dipped it in the acid, so that’s why it’s not white. I made the holes for the jump rings (the ring that holds the two pieces together) in wax using the tip of a jewelry blade because it was much easier than drilling into metal.

FINISHING PHASE

Image

Here are the pieces detached from the sprues, dipped in acid, but before being filed down.

Image

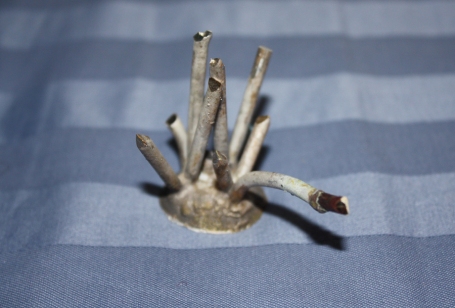
Here are the sprues. I used a pair of shears to cut some of them off because, as mentioned in another post, it’s less accurate but much faster. I did use a saw for a few of the sprues, though, because they were attached the back of the piece and filing down the nubs left over from the shears would have taken me forevvveeerr.

So after filing down the pieces (which took a while), I polished them up using a polishing machine. Let me just say, you need to have a very firm grasp on your piece while polishing it or it will fly out of your hands. That obviously happened to me…and those moon points and arrows are sharp. Needless to say, I gave myself a few stab marks trying to polish the pieces.

Finding jump rings that fit the small holes I made was a bit tricky but after some trial and error at AC Moore and Michaels, I managed to find some that fit (it also involved using a jewelry saw blade to widen the holes slightly). And in my most controversial decision– it made every jewelry-maker I talked to make a very judgy, disgusted face– I glued (yes, glued) the posts to the back of the earrings. (Shhh, don’t tell.) I basically ran out of time and soldering is not my strong point. In my defense, the posts are holding very well.

And finally, in what was the most distasteful part of the process, I slapped on bright red lipstick and took about 500 selfies of myself wearing the earrings. Taking close ups of my face/skin is definitely not on my Favorite Things list (it’s just after talking about feelings and eating glass), but I don’t have a model available.

BONUS PICTURES:

Image

THEY ARE SO SHINY. No really, they are super shiny and catch the light when you move your head. And I adore them.

Image

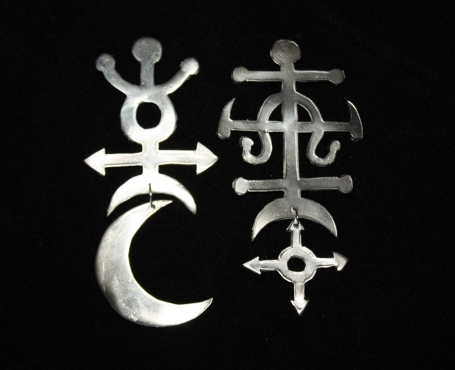
I felt like the shininess didn’t show as well in the picture with a black background.

Image

Mugshot wearing them to prove I have a top-half of a face.

All in all, I really, really, really like them a lot and will actually probably wear them in public. Which is progress, considering I almost never wear anything I make. They are huge and shiny, and that is all I want in anything (but especially earrings).

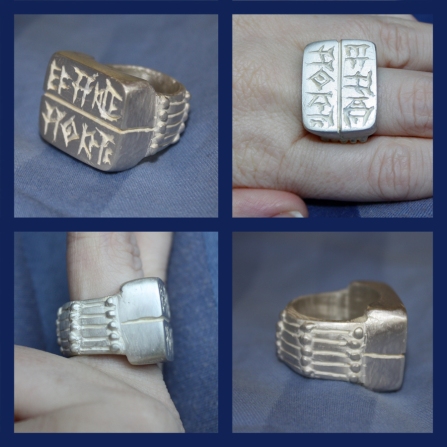
Lost-Wax Casting: Making a Silver Ring from Hammurabi’s Code

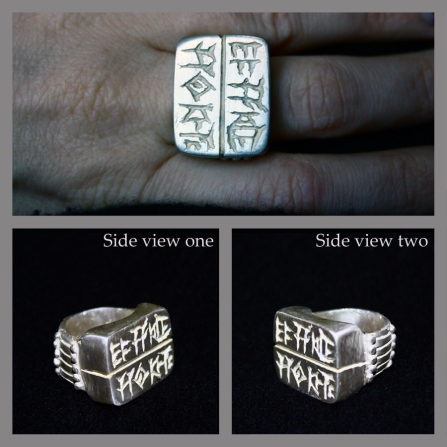
So I made my first cast metal jewelry piece, a silver ring:

hammurabiscodering

I decided it would be fun to document the process and post about how I made it. So let’s begin!

DESIGN PHASE

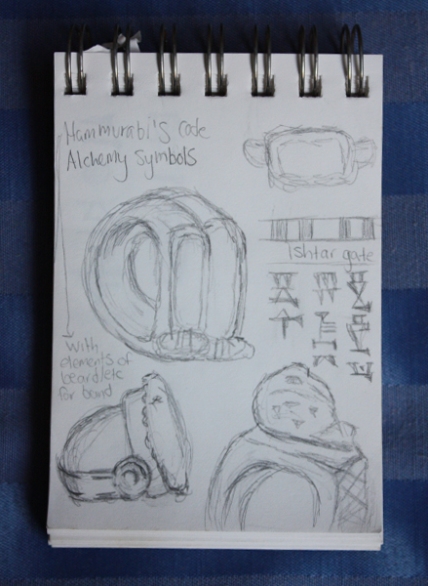
I decided early on to look at antiquities for inspiration. My first thoughts were of Ancient Egyptian jewelry, but I figured I wasn’t technically good enough to pull off something that complex. Here is my brainstorming session:

Image
I apparently thought maybe I was good enough to carve a bird onto a ring. Suuure.

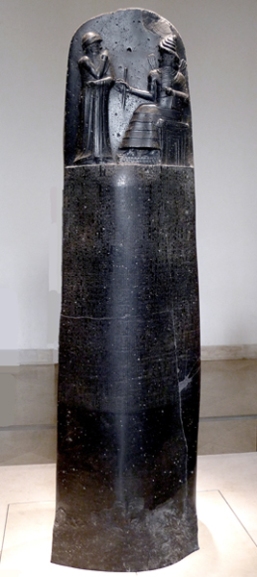
I settled pretty quickly on The Code of Hammurabi. For those unaware, The Code of Hammurabi is an ancient Babylonian legal code written in cuneiform. It is the origin of the phrase an “eye for an eye.” That sounds draconian by modern standards, but the code also features one of the earliest examples of the presumption of innocence. I chose it because a) I’m a lawyer, b) I really love cuneiform, and c) I thought the cuneiform would lend itself really well to be carved. I decided to make the top of the ring flat like a tablet and split it into two columns to mimic the design on the stele.

Image
Source. On view at the Louvre in Paris (which is a whole other issue…)

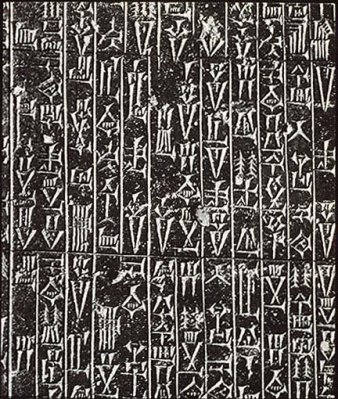
I picked the cuneiform I was going to copy at random (I do not know/read cuneiform!), but I didn’t just choose random characters. The characters do appear next to each other in the code.

Image
Source. Detail of the cuneiform on the stele.

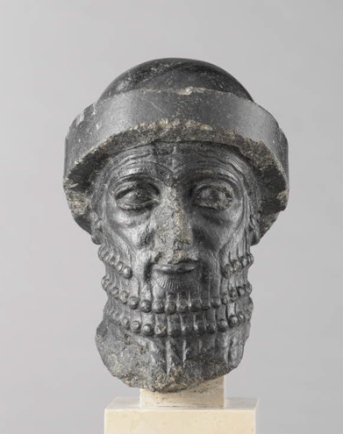
So next I had to figure out what to do with the band. I didn’t want to overdesign, so I wanted something that was clean but that somehow related to the general theme. I found my answer by looking at sculptures and statues of King Hammurabi.

Image
Source

I went right for his awesome beard. Perfect pattern for the band!

WAX SCULPTING PHASE

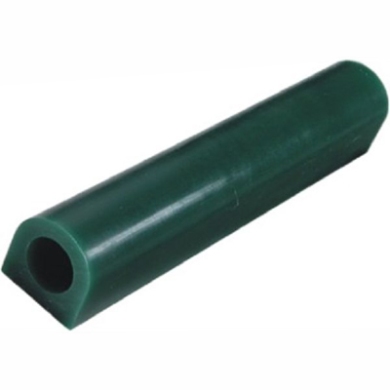
So after designing what you want, you have to make your piece out of wax. This wax piece should look EXACTLY as you want your metal piece to look. So this is what you start with when you’re making a ring:

Image
Source.

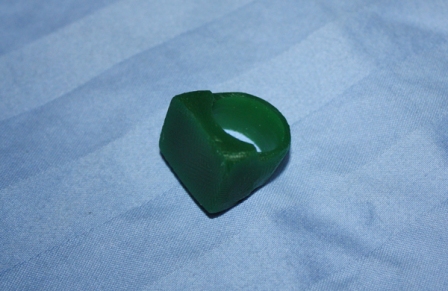
It’s made of hard wax. It is definitely noooot like a birthday candle (as I had thought maybe it would be). So you must take a blade and cut off an appropriate amount for your ring. You then can use the blade or a wax file to file down your piece into the shape that you want. It’s time consuming and actually quite difficult to get symmetry. Here is my ring all filed down:

waxring

For some reason, I didn’t take a picture after this step while still in wax. So I’ll just describe what I did! When I finally had the form I wanted (above), I took a tool similar to an x-acto knife and carved a deep groove in the middle of the flat tablet part of the ring. I then set about carving the cuneiform into the ring, which was less difficult than I thought it would be. I think I held the tool wrong or have a particularly strange hand, because I ended up damaging some nerves in my hand while doing this and have had a numb thumb ever since. (Hooray, strange medical issues unbefitting my age!)

Anyway, I then carved the five parallel lines on the band. The last, and by far most difficult, part was getting the raised baubles on the band. To make those, I had to use a knife tool, heat the knife in fire, and then cut into a softer piece of red wax so that it was liquidy on my blade. I then carefully dripped the liquid wax from my blade onto the ring in the shape of a little bauble. It was very difficult to get even sizes and even more difficult to prevent the liquid wax from wandering into the already-carved grooves on the band.

When I finally had the ring exactly as I wanted, it was time to put the sprues on. What are sprues?

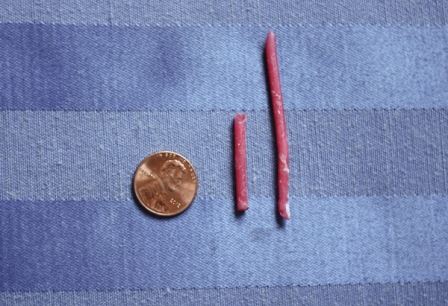
sprues
Penny is for size reference. (Note: this is also the wax I used to make the aforementioned baubles.) 

These are cylindrical pieces of soft wax that must be attached to your piece. The bigger and thicker your piece, the more sprues you need to attach. I will explain why in a moment. You attach these by heating your knife tool in the fire and essentially melting the ends onto your piece and allowing them to harden. You can then shore it up by melting some wax and building up the attachment. You do NOT want any seams. You then must attach your piece to the bottom of a hollow metal cylinder.

INVESTMENT PHASE

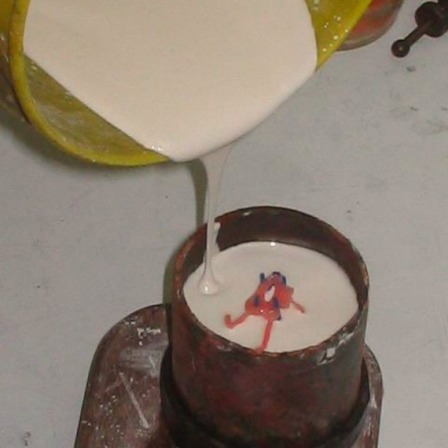
My least favorite part! In this part, you need to create an investment mix (which is like plaster), that you then pour into the cylinder with your piece in it. The investment hardens around the piece and creates a negative of your piece.

pouringinvestment
Source

Creating the investment is a very time-sensitive process because it begins to harden within ten minutes of being created. You must mix it, de-bubble it with a funky machine with a bell jar, pour it into the cylinder, and then de-bubble it again in the machine. You also have to be very careful to create the right amount (a lesson I learned the hard way…). The cylinder with your piece is then placed in a kiln the day that you are ready to cast in metal!

CASTING IN METAL PHASE

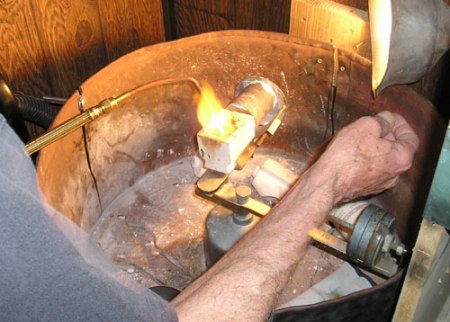
Obviously the best part! This type of machine is used to cast in metal:

castingjewelry
Source

As you can see, there is an arm in the middle of the machine that you must wind up. You then take your cylinder out of the kiln and place it in the machine. You use a blowtorch to heat up the crucible (which you can see in the picture above) until it is red hot. You add your casting grain metal (in my case, sterling silver) into the now-hot crucible  and continue to heat it with the blowtorch, adding flux as needed, until the metal has melted into liquid. Once the metal has melted into liquid, you release the arm, and it spins around with your cylinder at the end. The centrifugal force forces the liquid metal down the arm of the device and into your cylinder. The wax piece within the mould melts out (perhaps why they call it lost-wax) and is replaced by the metal. This is why the sprues are so important– the liquid metal travels through the channels created in the mould by the sprues. Without the sprues, the metal could not get into the mould and would not be evenly applied throughout the piece.

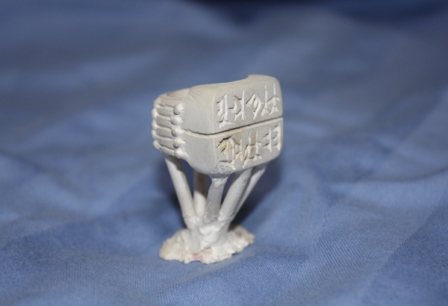
So once this process is complete, you then take the VERY HOT cylinder and wait for it to cool down a bit. It is then dumped into a pail of water to cool it down further and to dissolve the investment. You have to clean out the mud-like investment and then fish your now-metal piece out of the bucket. You clean off the all the investment from your piece and then put it in a mild acid (…I don’t know why acid. Just go with it…), which turns the piece white. This is how my ring looked after all that:

ringstand

Notice how it has that stand-like thing attached to it. Those are the sprues! See how it was attached to the bottom of the cylinder? The sprues must always come to a point like that so that they can be easily attached to the bottom of the cylinder (….a concept with which I had trouble…).

FINISHING PHASE

So, after all that, there is still more to be done (haha, of course there is)! You must use either a pair of clippers or a saw to get those sprues off. The clippers are much faster but less accurate. Screw accuracy, I totally used the clippers. You then must use a metal file to file down the pieces of sprue you couldn’t get off with the blade/clippers so that it is completely flush with your piece and looks as you intended. This is time consuming and easier said than done.

My ring had a casting issue that caused an imperfection on the inside, which required some soldering. I’m not going to go into that since the teacher fixed it for me while I watched nervously. So after the sprues are totally gone, the piece should be filed and sanded down as desired to get rid of file marks and other imperfections. You can also, as I did, put the piece in a vice and use a very sharp knife to create deeper cuts in the piece if the cuts you made to the wax didn’t go deep enough.

Finally, you polish your piece or add some kind of finish! I opted for simply washing it down with pumice powder to give it a dull gleam. I didn’t think a high polish finish was appropriate for the subject matter. I was thinking of burnishing the piece, so that the cuneiform lettering and the parallels lines on the band would be black, but I’m on the fence with it. Maybe I won’t. I don’t think I’ll ever feel like this piece is finished though! As per my usual, all I can see are all the flaws and things that need fixing. But I think it’s not bad for my first lost wax-casting piece!

Here is more of my finished (maybe?) piece:

hammurabiscodering
Two pictures taken with flash, two taken with natural lighting.